
Sommaire
Making your own deli ham can look intimidating, especially when you watch butchers work on whole hind legs weighing 22 to 26 pounds. Yet it is a project a beginner can pull off, as long as you don’t start with the wrong method.
I’m a French homesteader, and I sold my charcuterie at a farmers’ market in southwest France for four years. In this article, I share what I learned the hard way:
- what works well from the very first try,
- the technical mistake that makes a ham fall apart,
- the simplest method to get a good homemade deli ham,
- and the safety rules you cannot skip when you work without nitrites.
One thing sets this recipe apart from most American ones. Nearly every deli ham recipe in the US uses curing salt (Prague Powder #1), which contains nitrite. This one doesn’t. Nitrite is a safety net, so without it, the cooking, cooling and storage rules below are stricter, and they are not optional.
1. Why make your own deli ham?
Before we get to technique, let’s ask a simple question: is homemade ham worth it, both for your wallet and for the taste?
It often costs half as much
Here in France, good pork costs around €8 to €10 per kilo (organic shoulder or leg, for example). The finished ham then comes to €12 to €15 per kilo, ingredients and energy included.
An artisan or organic ham sells for €22 to €28 per kilo in French shops, so the saving is real. Prices are different where you live, but the ratio tends to hold: homemade ham costs roughly half as much as a quality store-bought one.
You control every ingredient
The homemade version is made of:
- pork, salt, water and herbs,
- no additives,
- no endless ingredient list,
- and meat whose quality you know exactly.
It’s a real self-sufficiency skill
Knowing how to process meat yourself is one of the pillars of food self-sufficiency. It is a simple, affordable and repeatable skill, and it fits into a broader way of feeding your family from your own work.
Here is the method on video. The video is in French, but you can follow every step on screen.

2. Why a whole ham leg is a bad idea for your first try
This is probably the number one beginner mistake: buying a whole hind leg (22 to 29 pounds) to “make ham like the pros”.
It sounds tempting on paper. In practice, it is a trap.
Too much complexity at once
A whole leg means you have to deal with:
- three bones to remove (hip bone, tail bone and femur),
- about ten muscles to identify,
- membranes to trim,
- pieces to reassemble,
- and a huge amount of leftover meat to process (13 to 22 pounds).
A butcher masters all of this, but a beginner doesn’t. It is not a matter of intelligence. It is a matter of hand skills, technique, time and experience.
You can lose a lot of money
If the muscles don’t bind together, your ham:
- won’t hold its shape,
- won’t slice cleanly,
- and will crumble into pieces.
Ruining a 7-pound piece costs you a few dozen dollars. Ruining a 29-pound leg means well over a hundred dollars goes in the trash.
You learn less
You learn much faster when you:
- work on a single muscle,
- understand how the brine works,
- learn to control the core temperature,
- and pay attention to the texture.
Starting with a whole leg is like learning to swim by diving into the deep end: it is stressful for no good reason.
3. The simple method for your first homemade deli ham
This is the method I recommend 100% for beginners, long before you think about a whole leg.
All you need is:
- a ham press (also sold as a ham maker or ham mold) for 3 to 4½ pounds of meat,
- a large stockpot,
- a probe thermometer.
Step 1: Choose the right cut
For an even, tender ham that slices easily, use a single piece of meat:
- pork shoulder (picnic),
- a thick cross-cut slice of fresh ham (leg),
- boneless pork butt,
- or a single muscle from the leg, such as the top round.
A piece of 3 to 4½ pounds (1.5 to 2 kg) is ideal to start with.
Step 2: Trim the meat (the step everyone skips)
The goal is to expose the bare meat by removing all the white membranes around the muscle.
Why does it matter? Because those membranes stop the muscles from binding together during cooking. It is the mistake that ruins most homemade reassembled hams.
Even with a press, poor trimming gives you a ham that crumbles, uneven slices and a weak texture.
Step 3: The brine (very simple)
For a nitrite-free homemade ham, the brine is made of:
- 1 liter (about 1 quart) of water,
- 100 g (3.5 oz) of salt, which makes a 10% brine,
- and herbs: thyme, bay leaf, rosemary and juniper berries.
Weigh the salt rather than measuring it by volume, because salts differ a lot in density. Submerge the meat in the brine for 48 hours in the fridge, at 36 to 39 °F (2 to 4 °C). For a more even result, you can also inject brine equal to 10% of the meat’s weight, which is about 7 fl oz (200 ml) for a 4½-pound piece.
Step 4: Into the press
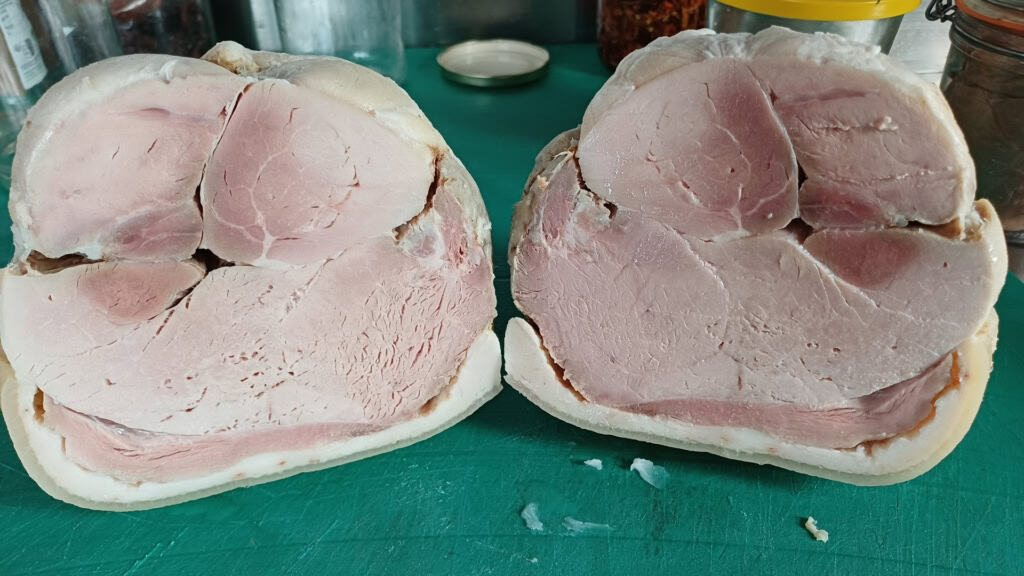
Pack the meat tightly into the stainless steel press. The spring will compress the muscle while it cooks.
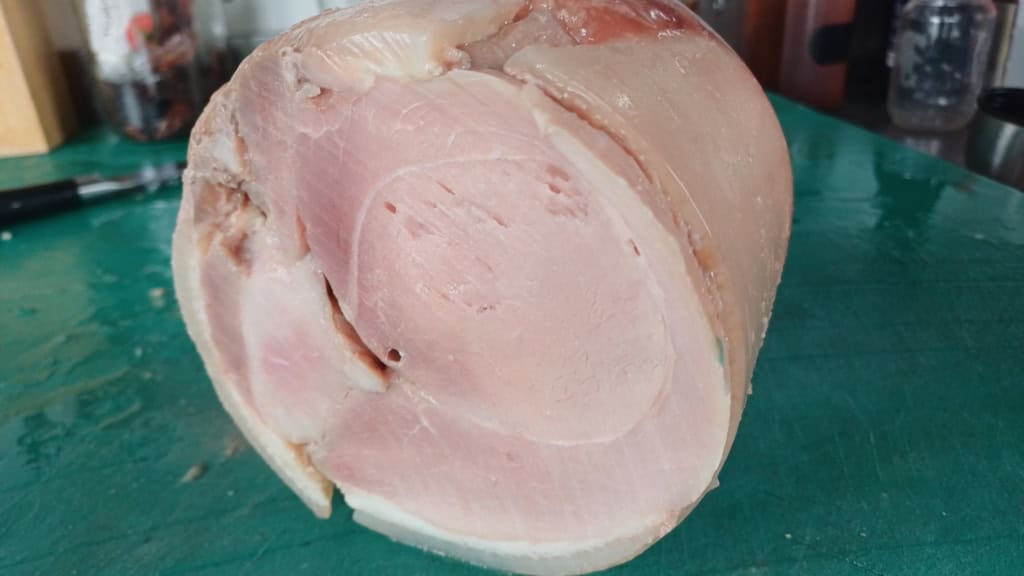
The press gives you three things at once: a perfect shape, muscles that bind together, and a ham that holds from the very first try.
Step 5: Cook in a water bath at 167 to 172 °F (75 to 78 °C)
This is the key step, especially without nitrites.
Why not 149 to 154 °F (65 to 68 °C) like professional recipes? Because those recipes rely on:
- nitrites, which act as an antibacterial safety net,
- whole hams cooked sous vide,
- and tightly controlled processes.
For a beginner with a home press, 167 °F (75 °C) at the core is a safety margin you need.
Insert a probe into the center of the meat. Cook until the core reaches 167 °F (75 °C), then hold it there for 30 minutes.
Step 6: Cool it fast
Take the press out of the water bath and plunge it into an ice water bath, with the probe still in place, and keep adding ice. A trickle of cold tap water is far too slow for a 4½-pound piece.
The goal is to get through the 131 to 50 °F (55 to 10 °C) range quickly, because that is where bacteria multiply fastest. The core should drop to 77 °F (25 °C) within 1 hour 30 minutes at most.
Then leave the ham in the fridge for 12 hours before slicing.
4. The technical mistakes that ruin a homemade ham
After many attempts, and a few failures, here are the two big traps.
Mistake 1: Poor trimming
The membranes don’t melt together. During cooking, they stop the muscles from fusing.
The result is a crumbly ham, slices that break, and an uneven texture.
Trimming is NOT cosmetic. It is the key to a good homemade ham.
Mistake 2: Starting with a whole leg
As explained above, a whole leg means too much meat, too many steps, too many weak points and too many risks.
You can make use of a whole pig one day, but not on your first try.
5. Food safety: what you REALLY need to understand
Many beginners panic at the thought of botulism. The reality is that the spores being present is not the danger. The danger is giving them the conditions to wake up. Without nitrite, no single barrier is enough on its own, and they don’t all do what people think.
For a nitrite-free homemade ham, here are the four safety barriers.
A 10% brine: for flavor, not for safety
The finished ham contains only about 2% salt. According to ANSES, the French food safety agency, it would take at least 3.5% to stop botulism. Salt gives flavor and texture, but it does not protect you.
Thorough cooking (167 °F / 75 °C at the core for 30 minutes)
It kills active bacteria such as listeria and salmonella. It does not destroy botulism spores, which survive cooking.
Fast cooling
Use an ice water bath and bring the core down to 77 °F (25 °C) within 1 hour 30 minutes, then below 50 °F (10 °C) in less than 10 hours. Without nitrite, nothing makes up for slow cooling.
Cold and short storage (39 °F / 4 °C maximum)
Cold keeps the spores dormant, but not forever. IFIP, the French pork industry institute, observed toxin forming in nitrite-free cooked ham during storage. Count on 3 days once the ham is cut, slice it just before eating, and freeze the rest in portions on the first day.
Together, these four barriers make the risk low. None of them makes it zero, and none of them lets you skip the others.
6. Is homemade ham worth the money? An honest look
Let’s take a concrete example with French prices, for a 2 kg (4½-pound) ham:
- the meat (shoulder at €10 per kilo) costs €20,
- salt and spices cost about €1,
- energy for the long cooking costs about €1 to €2.
That makes about €22 to €23 in total, so €11 to €12 per kilo. An organic artisan ham costs €22 to €28 per kilo in a French store, so you can realistically save around 50%.
But let’s be honest. If you count your time, if the muscles fail to bind, or if you buy a whole leg, the final cost can climb back up.
What stays true is that homemade ham tastes better, is simpler than it looks, and puts you in control of what your family eats.
7. The smart way to progress with homemade ham
If I had to sum it up in one sentence:
Start with a press and a single muscle. Don’t start with a whole leg.
Here is the progression I recommend, in three stages.
Stage 1: A homemade ham in a press
You use a single muscle, a simple brine and a water bath. You get a clean result from the first try.
Stage 2: A reassembled ham (2 or 3 muscles)
You learn to trim, assemble and get the muscles to bind.
Stage 3: A whole boned leg, the butcher’s way
You only get there once the hand skills are second nature.
Conclusion: homemade ham is easy if you start right
Homemade ham is an incredibly good teacher. You learn to process meat, you build a real skill, you control the flavor and the ingredients, you cut the cost of quality protein, and you become more self-sufficient.
To get there without stress, you need to choose the right method, trim the muscle properly, use a press, control the cooking, and cool the ham quickly.
Homemade ham is often the first step into processing your own meat. Terrines, sausages, broths and canned meats come next, and together they let you use the whole animal. If you read French, all my homemade charcuterie recipes are on the French side of this site, written for beginners and tested in real conditions.