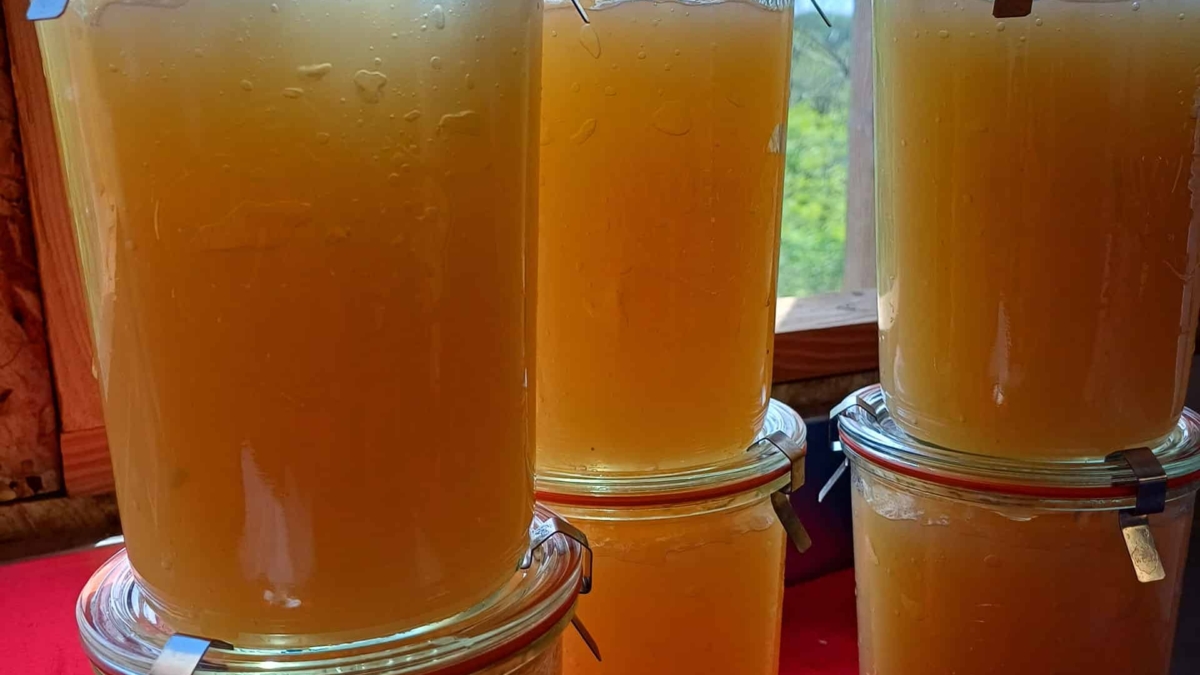

The first time, I made two liters of bone broth, about half a gallon. It was gone in four days. Today I never make less than ten liters, and my last batch gave twenty-four, turned into twenty-seven jars that keep for a year in my cellar. Here is the complete method, with the real numbers, the exact temperatures, and what it took me three years to understand.
What you’ll learn
- Why temperature matters more than cooking time, and why almost every recipe gets it wrong.
- How to choose your bones, and why pork is the most underrated option for bone broth.
- The beginner method (one carcass, five liters, one night) and the scaled-up version (24 liters, with a full yield breakdown).
- How to concentrate your broth so it keeps a year on the shelf, and what that really costs per jar.
Sommaire
If you search “bone broth recipe”, you’ll find the same thing ten times over: two liters of water, a chicken carcass, two carrots, a stick of celery, a splash of apple cider vinegar, twelve hours of simmering. And then what? You drink it within the week, and start again.
That is exactly what I did at first. And that is exactly why I gave up for six months: the effort and the result just didn’t add up.
What changed everything was understanding one simple thing: bone broth takes cooking time, not attention. Whether you simmer two kilos of bones or twenty, you light the burner once, you barely watch it, you turn it off once. The effort is almost the same. The result, though, grows with the pot.
From there, bone broth stops being a recipe and becomes a production. And a production is a different animal: you plan it, weigh it, preserve it and count it. That is what I have been doing for three years, here in Aveyron in southwest France, and that is what I’m going to show you, including the exact numbers from my last batch, on April 22, 2026.
You’ll find two levels in this article. The first is your first batch: one carcass, five liters, one night, no special equipment. The second is scaling up. Start with the first. The second will wait for you.
1. Choosing your bones: this is 80% of the result
1.1 Collagen, and the panna cotta test
What you want from a bone isn’t the meat. It’s collagen, a structural protein found in joints, cartilage and tendons. During a long cook, it breaks down into gelatin, which dissolves into the water.
There is a foolproof test, and it costs nothing: put a bowl of your broth in the fridge. If it sets completely, to the point of wobbling like a panna cotta when you take it out, you’ve nailed it. If it stays liquid, your pot was short on joint bones. It isn’t a failure, it’s just less concentrated.
The first time it happened to me, I thought I’d made a mistake. I opened a jar from the fridge and found a firm block of jelly instead of a liquid. It was the opposite: it was a success.
1.2 Collagen-rich bones, ranked
Not all bones are equal. Here is the ranking, by how well they actually work:
- Beef or veal feet: the absolute champions. The number of joints in a single foot is impressive.
- Pig’s feet: a very gelatinous broth, ideal for terrines and sauces that need body.
- Chicken feet: underrated, and often free from a farmer. I add them to my carcasses whenever I can find them.
- Oxtail: excellent, for collagen as well as flavor.
- Shanks (beef or pork): very good results, and easy to find at the butcher.
Marrow bones, the femur and tibia, bring little collagen but a lot of fat and flavor. I often mix them with feet: the texture comes from the feet, the flavor from the marrow.
1.3 Beef, chicken or pork: the real ranking
Chicken is the beginner’s first instinct, and that’s fine: it’s easy to find, quick, and mild in flavor. But it is naturally the least collagen-rich. A carcass on its own gives a decent broth that rarely sets. Add wings and necks, which are much easier to find than feet, and you move up a league.
Beef has the reputation. Its flavor is deep and full-bodied, irreplaceable in a sauce base or a winter stew. But be careful: marrow bones alone won’t do it. It’s the feet, shanks and tails that do the work.
Pork is the forgotten one in this conversation. In my own practice, the collagen ranking is clear: pork, then beef, then chicken, as long as you use the collagen-rich cuts in all three cases. A pig’s foot broth that comes out of the fridge as a firm block of jelly is the most consistent result I know.
1.4 Traceability: why pork wins when you care about sourcing
This point rarely comes up, and yet it matters a lot if you want to know what you’re eating.
In the French beef industry, carcasses are cut into standard lots at the slaughterhouse, and the feet and heads often go off to specialized channels, frequently the gelatin industry. When a small veal farmer tells you the feet “may not be from his own animals”, he isn’t dodging the question, he’s being honest: at the slaughterhouse, feet from several animals are mixed before being sent back out.
Pork works differently. The pig arrives whole at the butcher’s, it is cut up on site, and each piece stays identifiable. If you buy pig’s feet from a farmer who slaughters locally, you can be sure they are his animals’ feet. Your local system may differ, but the question is worth asking your farmer, because bones concentrate what the animal took in over its whole life.
1.5 The bone-to-water ratio
I aim for about 1 kg of bones per liter of water, roughly 2 lb per quart. It isn’t high precision, but remember the threshold: below 500 g of bones per liter, about 1 lb per quart, you get something closer to vegetable broth than real bone broth.
2. Your first batch: 5 liters, one carcass, one night
2.1 Equipment: nothing special
A stockpot. A fine strainer. That’s it. No pressure canner, no dehydrator, no cold room. If you have an 8-liter (2-gallon) pot and a freezer, you can start this weekend.
The one purchase I really recommend is a probe thermometer, around €15. You’ll see why in two paragraphs.
2.2 The four steps
Step 1: blanching. Put your bones in the pot, cover with cold water, bring to a boil and let it go for 10 minutes. The goal isn’t to cook them: it’s to bring up the leftover blood and impurities that would give a strong taste and a dirty color.
Then throw out that first water. Many recipes tell you to skim patiently; with large volumes, it’s a waste of time. Rinse the bones under the tap and put them back in the clean pot with cold water.
The tip I wish someone had given me: do this blanching in a smaller pot, in several batches. I wasted hours handling a 50-liter pot full to the brim for this silly step.
Step 2: the long cook, and above all, the right temperature. This is where the real know-how is, and this is where almost every recipe goes wrong.
They tell you to “bring it to a simmer”. A simmer is around 203 °F (95 °C). I cook between 180 and 190 °F (82 and 88 °C), and I never go higher.
Why? Because above that, the movement of the liquid emulsifies the fat into the broth. The result is cloudy and milky, which is exactly the principle of Japanese tonkotsu, where it’s the goal. Here, it’s a problem: you can no longer skim the fat cleanly, and that emulsified fat also gets in the way of the heat inside the jar if you want to can your broth. It turns a safe step into a gamble.
At 180 to 190 °F (82 to 88 °C), the water barely moves. The collagen comes out quietly, the fat stays on top, and you can lift it off in one go. That is where the €15 probe becomes the best investment in your kitchen.
How long? It depends on the animal:
- Poultry: 10 hours. Beyond that, I have never seen the broth get more concentrated. It’s just fuel out the window.
- Beef and pork: about twenty hours.
- Fish: 6 to 8 hours, no more, or the taste turns bitter.
I cook my broth plain: no salt, no aromatics. That’s what makes it a universal base. If you want to flavor it, add the vegetables only in the last 4 hours, otherwise they fall apart completely.
Step 3: resting cold and removing the fat. Pull out the big bones by hand, then chill the whole pot overnight (8 hours for me, in a cold room; your fridge will do for small volumes).
The cold does two precious things: the fine particles sink to the bottom, and the fat rises and sets into a slab. You lift it off with a spoon, in one piece. It’s white for beef and yellow for poultry. In my kitchen, it goes into terrines. Nothing is wasted.
Step 4: straining. Pour the broth through a fine strainer lined with cheesecloth, without ever scraping the bottom of the pot: you’d stir back up everything the night allowed to settle.
2.3 What it costs
The real expense isn’t the bones, which are often free and sometimes a few euros a kilo. It’s the energy. And that is exactly why making it in volume changes everything: the cooking cost is shared across a single pot.
Here are the orders of magnitude, at the prices I see in France:
| What you buy | Bone price | Broth you get | Bone cost per liter |
|---|---|---|---|
| Chicken carcasses (farmer, neighbor, your own leftovers) | €0 | 2 to 3 L | about €0 |
| 2 organic pig’s feet (farmer) | €3 to €5 | 3 to 4 L, plus the meat for a terrine | about €1/L |
| 10 kg of beef bones (local farmer) | €0 to €15 | 8 to 10 L | €0 to €1.50/L |
| 10 kg of beef bones (artisan butcher) | €20 to €40 | 8 to 10 L | €2 to €4/L |
| Store-bought organic bone broth | n/a | n/a | €8 to €15/L |
Even buying your bones at full butcher prices, you stay three to five times below the price of store-bought broth. And a store-bought jar doesn’t leave you any meat for a terrine.
3. Scaling up: my batch of April 22, 2026
Here, without rounding anything, is what my last big batch gave. The numbers come from my processing sheet, weighed on the spot.
3.1 The raw material
An order from a veal farmer in Aveyron, the EARL du Bouis:
| Piece | Weight |
|---|---|
| 1 veal head | 1.378 kg (3 lb) |
| 4 veal feet | 7.316 kg (16.1 lb) |
| Bones (femurs, shanks) | 15.6 kg (34.4 lb) |
| Total | about 24.3 kg (53.6 lb) |
Total cost: €48.69, with full traceability from the slaughterhouse to the cutting plant.
Note the proportion: more than a third of the weight is feet and head. That’s no accident, it’s the whole point. That’s where the collagen is.
3.2 Singeing the feet
After blanching, I do something you won’t find in any blog recipe: I pass the feet quickly under a kitchen torch. One quick pass, a few seconds per foot, just enough to burn off the leftover hairs. Without it, the broth keeps a faint tallowy taste that you can never quite put your finger on.
3.3 The cook
12 hours at 180 to 190 °F (82 to 88 °C). The veal head and feet come from a young animal: the bones are tender and the collagen comes out quickly. With adult beef, I would have gone twice as long.
3.4 The full yield breakdown
This is the table nobody publishes. From the roughly 24.3 kg (53.6 lb) that went in:
| Output | Quantity | Where it went |
|---|---|---|
| Strained broth | about 24 liters (6.3 gallons) | Stage 2 (concentrating) |
| Meat recovered | 5.2 kg (11.5 lb) | Terrines and concentrate |
| Skimmed fat | 1.78 kg (3.9 lb) | Cooking, terrines |
| Spent bones | 12.3 kg (27 lb) | Compost |
Twenty-four liters of broth. And 5.2 kg (11.5 lb) of meat still clinging to the feet and head after twelve hours of cooking: gelatinous, melting meat that ninety-nine kitchens out of a hundred throw away.
In my kitchen, it became six 700 g (1½ lb) packs of veal head and foot terrine, at €3.94 a kilo. The rest, about 1 kg, went back into the concentrated broth.
That is the real economics of bone broth: it only becomes truly worthwhile when you eat everything. The broth alone is already interesting. Using the whole animal pushes it into another league.
4. Concentrating and canning: 27 jars that keep a year
Twenty-four liters of broth is wonderful. It’s also twenty-four liters to store somewhere. A family freezer won’t survive it.
Hence the second stage, the one that really transformed how I work.
4.1 Reducing
I put the strained broth back in the pot, uncovered, and let it reduce by a factor of 3, which takes 2 to 3 hours. The water leaves, the rest concentrates. Twenty-four liters become a little over eight kilos.
4.2 Pressure canning
The concentrate goes into 160 g (5.6 oz) jars, then into the pressure canner: a Presto, at 15 PSI, 250 °F (121 °C), for 25 minutes.
Since many of you will compare this with the USDA, here is how it lines up. The USDA has a tested process for chicken or meat stock in a pressure canner: 20 minutes for pints and 25 minutes for quarts, at 10 lb with a weighted gauge or 11 lb with a dial gauge, adjusted for altitude. My 25 minutes at 15 PSI, in jars much smaller than a pint, go beyond those conditions. But I have to be honest on one point: the USDA process was tested on broth, not on a broth reduced three times. A concentrate is thicker, and heat travels through it more slowly. My practice is therefore outside the tested process, strictly speaking, and I do it knowing that.
When you open a jar, keep one last safeguard: before eating broth from a jar, bring it to a full rolling boil for 10 minutes, plus one minute for every 1,000 ft (300 m) of altitude. Warming it up isn’t enough, it has to boil. This destroys the botulinum toxin, but not the spores, and it never rescues a doubtful jar: that one gets thrown out without tasting.
And be honest with yourself about one more thing: 250 °F (121 °C) cannot be reached in a boiling-water canner, which tops out at 212 °F (100 °C). Bone broth is a low-acid food, so it carries a botulism risk. Without a pressure canner, don’t gamble: freeze it instead, which is perfectly safe.
4.3 The result, in numbers
From this batch, stage 2 gave 8.22 kg (18 lb) of concentrate:
- 27 jars of 160 g (5.6 oz), canned, into the cellar, best before April 2027;
- 3.9 kg (8.6 lb) into the freezer.
A 160 g jar, diluted five times, gives back about 800 ml (3⅓ cups) of ready-to-use broth. The 27 jars therefore represent the equivalent of 41 liters (almost 11 gallons) of standard broth, keeping for a year without electricity.
And the cost? I’ll give you both calculations, because the difference is telling:
| Calculation | Cost of one 160 g jar |
|---|---|
| Raw material only (€32.14 allocated to the broth ÷ 8.22 kg) | €0.63 |
| Full cost (raw material, energy and jars) | €1.14 |
Remember €1.14 a jar. It’s the honest number, the one that includes what most calculations leave out. Store-bought organic bone broth sells for €8 to €15 a liter in France.
4.4 What’s really in it
Since I don’t like vague claims along the lines of “rich in collagen”, I wanted to measure it.
I took two identical cups of concentrate, put them in the dehydrator at 122 to 131 °F (50 to 55 °C) for 24 hours, and weighed what was left at the bottom.
The result: 10.5 g of dry matter per 100 g of concentrate. Using the usual conversion factor for a defatted broth, that’s about 37 kcal per 100 g.
Brought back to the unreduced broth, since the reduction was threefold, that comes to about 3.5 g of dry matter per 100 g. It seems like little. But that dry matter is almost entirely gelatin and minerals: exactly what we came for.
5. Using your broth every day
Having broth in stock is useless if you don’t work it into your cooking. Here are my six uses, from most to least frequent.
- As a soup base. A warmed jar and a few seasonal vegetables make a homemade soup in fifteen minutes, with a depth no bouillon cube can come close to.
- To cook grains. Replace the water with broth for rice, barley or quinoa. The grains soak it up and become a dish in their own right.
- To deglaze. A ladleful in the still-hot pan after searing meat. Two minutes, and you have a sauce.
- As a base for stews. Stews, pot-au-feu, osso buco. It replaces any store-bought stock, with no additives or flavor enhancers.
- Drunk as is. In winter, a warmed jar in the morning. It’s a habit I picked up and I’m not letting go of it.
- For the kids. If they make a face at plain broth, add a carrot and a sweet potato in the last hours of cooking. The slight sweetness changes everything. At our house, it has become the go-to for runny-nose winters.
5.1 My seasonal routine
I don’t make broth as I go. I make it in two sessions:
- October and November: two batches of 15 to 20 liters. It’s the end-of-season slaughter period, and the raw material is there. The goal is the winter stock.
- January: a top-up batch of 10 liters if the autumn stock goes faster than planned, which often happens in the middle of soup season.
- Spring and summer: nothing. We finish the jars.
Two days of work a year, and broth all year round. That is exactly the spirit of the family food reserves I stand for on Pleine Terre.
Conclusion
Bone broth isn’t a complicated recipe. It’s even one of the simplest preparations in food self-reliance: bones, water and time.
But three things separate a disappointing broth from a remarkable one, and none of them is what you’d think. The first is the quality of the bones: feet, shanks and joints, not marrow bones alone. The second is temperature: 180 to 190 °F (82 to 88 °C), never a boil, because an emulsified broth can’t be fixed. The third is volume, because the same effort gives you five times more.
If you’re just starting, don’t aim for my twenty-four liters. Take one chicken carcass, a pot, a €15 probe, ten hours of cooking, and freeze it. That’s already half the way there, and it costs almost nothing.
The rest, the pressure canner, the reduction, the twenty-seven jars lined up in the cellar, is a matter of curiosity and patience. I got there step by step, weighing, taking notes and making mistakes. My first two liters, gone in four days, aren’t an embarrassing memory: they were the first step.
If you’d like to go further with the same mindset, my garlic confit and garlic in oil guide and my slow French method for pork rillettes apply it to other home preserves.
FAQ
Can you make bone broth with bones that are already cooked?
Yes. A Sunday roast chicken or the bones from a pot roast work perfectly well. The result will be a little less rich in collagen than with raw bones, but the broth is still good and nourishing. It’s an excellent way to waste nothing.
Should you add vinegar to bone broth?
Some recipes recommend a splash of apple cider vinegar at the start to help extract minerals. The scientific evidence on this point is weak. Personally, I don’t add any: I prefer a neutral broth with no added acidity.
My broth is very dark. Is that normal?
A dark color usually means the bones weren’t cleaned well enough during the first boil. It isn’t dangerous, and the broth is still fine to eat, but the taste will be stronger and less delicate.
How do you know if a canned jar of broth is still good?
Check four things before opening: the lid must still be sealed (no flex when you press it), there must be no visible bulging, you should hear the little “pop” when you open it, and the smell must be normal. If any of these signs is missing, throw it out without tasting.
How many times can you reuse the same bones?
One long cook is enough to extract most of the collagen and minerals. A second broth from the same bones will be much less concentrated. I don’t do it.
Can you make bone broth in a pressure cooker?
Yes, and the time saved is real: count 2 to 3 hours under pressure instead of 12 to 24 hours of simmering. But the pressure and the boiling inside the cooker emulsify the fat into the broth, just like in a Japanese tonkotsu. The result is cloudy, milky and hard to skim cleanly. For broth you’ll drink right away, that’s no problem. If you want to can it, I advise against it: the emulsified fat gets in the way of even heating in the jar. Keep the pressure cooker for broth you’ll drink within the week.